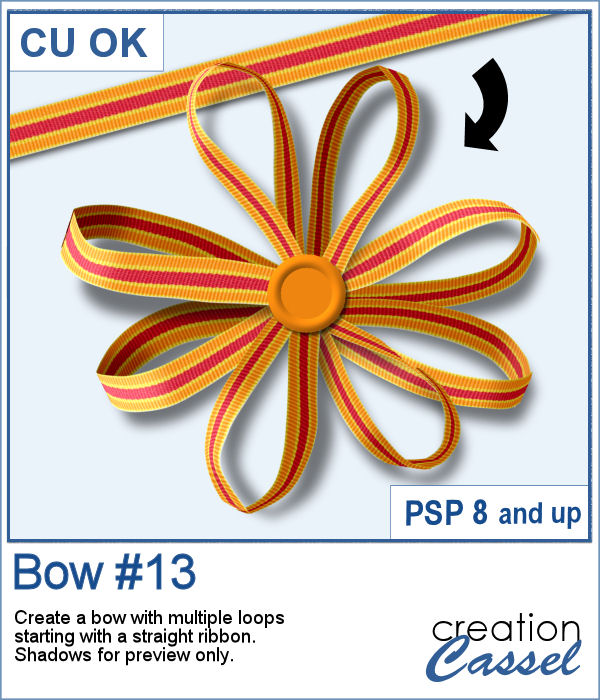
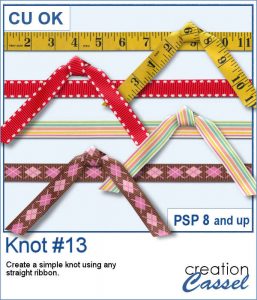
Web
Analytics

New script – QR Code

cass-QRCodeQR codes might be used as a way to direct someone to a website or use a coupon for a purchase, but you can use that pattern to create some fun labels.

This script for Paintshop Pro can replicate the look of a QR code, either in traditional black and white color, but also using a different color instead of the white, and even use two different colors to match your actual project. And unlike the real QR Codes, those created by the script can include a short text in the font of your choice. Just a fun way to create a unique tag or label.

Get this script in the store : QR Code.

Do you want a chance to win this script? Tell me how you can think of using those labels. Be creative. I know you can make tags, but what else? What other medium could you use to display them? Tell me in the comments below and i'll pick a winner that will be announced next week in the newsletter. Not a subscriber yet? Not a problem. You can register here and it is free (and you only get one email per week).

cass-QRCode-InspirationAs a way for you to sample the result of this fun script, I created 6 inspirational tags for you, in various basic colors. Each tag is 300 pixels wide.

It will be up to you to use them where you want, either as an accent to a project, or as an inspiration.

So what will you do with them?

You need to be logged in to download this sample. You can either login, or register on the top of this page.

New script – Cube beads

Cube beads script for Paintshop ProThere are various ways to add letters or digits or fun symbols on a project. If you were a traditional paper scrapbooker, you might actually use some small beads, and you can do the same with Paintshop Pro.

This script will create various cubic shape beads with your choices of settings. You can choose the color of the bead, the color and the font for the text, the direction of the beads, the custom design you want to add.

Each bead will be about 300 pixels wide so you can easily resize them to fit your project. You can "thread" the beads if you want with any string (including some from the store). If you need to thread a bead facing left or right, just add a "hole" with the brush tool where the string would enter.

Get this script in the store: Cube-Beads script.

For a chance to win this script (or a future new release), tell me what message you would write using cube beads. Would it be a single word? a short phrase? a date? Tell me in the comments below and i will pick a winner next week to be announced in the newsletter. Not a subscriber yet? Not a problem. You can register here and it is free (and you only get one email per week).

Cube beads with digits in PNG formatAs a way for you to sample the result of running this script, i created a set of digits (with a hyphen and a blank) beads. I made them neutral white so you can use them in just about any project to write a date. I used a rope tube from this set to "attach" the beads on the bottom, and rotated the beads slightly to match the string curve (I find it easier to draw the curved string first and adjust the bead orientation than the reverse).

You can use those to write a date or any other number you need (the address of your new home, the year for a birthday, the date on a calendar, etc.)

What can you write with those digits?

You need to be logged in to download this sample. You can either login, or register on the top of this page.


Paintshop Christmas

PaintshopChristmas-400Join us tomorrow, December 6th, for our monthly live presentation.

We will look at various projects you can do with Paintshop Pro. I already got a few interesting suggestions for projects i will illustrate and demonstrate. Come and add yours too.

Attending is always FREE, and you get the chance to ask questions, comment, and chat with the other attendees.

REGISTER NOW

Remember that you can promote this presentation to your friends, in a Facebook group, in forums where you hand out, etc. The more we are, the merrier it will be!

New script – Circle Doodles

Circle Doodle script for Paintshop ProDid you ever like to play with those multiple gears in Spirograph (R) to create various types of designs?

Now, you can do the same in Paintshop Pro without the gears, and mostly, without the calculations needed to have a precise arrangement of the rotated layers, AND with the added speed of automation.

This script allows you to create an unlimited number of design, either from a randomly generated pattern, or your own. You can choose also the number of rotations, and you can even tweak the random design create for you.

Merge the layers if you want, or leave them unmerged if you want to tweak them some more. The possibilities are endless!

Get this script in the store: Circle Doodles

See how this script works and some ideas on how you can use the different options:

What could you do with such designs? Give me an idea of what element/effect you can create with this kind of design. I'll pick a winner, at random, and announce it in next week's newsletter. Not a subscriber yet? Not a problem. You can register here and it is free (and you only get one email per week).

cass-CircleDoodle-samplesFor this week, i ran the script twice to create two interesting patterns, and colored one version just with the brush tool.

One ends up as a frame, while the other is more of a solid shape. Maybe you can print them and cut them out to add to your Christmas ornaments? Or maybe use them on a greeting card?

They are all about 1000 pixels wide, and you get one version with only the outline, and one version with the filled in colors. You can use the outlined ones and paint them to your liking, to match your project.

You need to be logged in to download this sample. You can either login, or register on the top of this page.


Christmas bundle sale

Did you hear about the Creative Christmas bundle?

bundle-group-shot

It is a collection of 14 products offered by 14 fabulous designers, to help you save time, do more and enjoy the coming holidays.

You will find card templates to use with PSP (or with your favorite papers), craft patterns, scrapbook kits, recipe, printables, planners, ornaments to make, and much more. All those products would cost you over $200 to get separately, but you can save 85% of it, by getting the whole bundle this weekend.

You don't have much time: GET IT NOW for only $29.99!

It will be over, on Monday, Nov 30th, at midnight!

New script – Scattered Photos

Paintshop Pro script to scatter photosAlthough Paintshop Pro allows you to nicely arrange photos without too much effort of measuring (since you can use guides and templates), it might be a little bit more tedious to pretend you scattered photos randomly. Yet, it can be a great way to display lots of photos on a project.

In order to scatter photos, you need to open each of them, resize them (if needed), add a border (if you want), copy them, paste them on the base image, rotate them, move them where you want, and then repeat for each other photo. If you have 5 or 6 photos, that might be feasible, but what if you have 50 of them? That can definitely add up and take you time.

This script will take care of all the steps once you have given it the proper information: where the photos are, what size you want them, if you want a border, and where you want the photos to be scattered (in the center, on the outer edge or all over). Then, you can go get a coffee and it will be all done by the time you come back!

Since all the photos are left on unmerged layers, you can always tweak them later (after all, the script can't tell if it looks the way YOU want).

And furthermore, the script will add shadows to all the layers if you want to, saving you even more time.

Get this script in the store: Scattered Photos.

Do you want a chance to win this script (so you can display all your Halloween photos)? Tell me what is the maximum number of photos you have placed onto one layout. The winner will be announced next week, in the newsletter. Not a subscriber yet? Not a problem. You can register here and it is free (and you only get one email per week).

Facebook cover - layered template for scattered photosSince this script will work only on YOUR own images, I am sure you would not care much about using mine. So, instead of using photos to place them onto a base image, i simply created black rectangles, the size of regular photos, and used them instead of photos. I ran the script with those and let it place them all over the place on a Facebook cover template.

Since you surely didn't want to only have black layers, I promoted the borders to their own layers, added shadows on separate layers, and now, you can use the photo layers to place your own. Basically, with some extra work, I made a layered template for you.

Although you can manually replace each photo layer by your own photos, you can also save a lot of time by using the Speed Scrap script (especially the one for photos) as it will resize the photos, and mask them so you can tweak their placement and rotation without worrying about trimming the excess or having to use a photo of the same format.

You need to be logged in to download this sample. You can either login, or register on the top of this page.


Corel Paintshop Pro Challenge

Halloween-300Check out this week's #CorelChallenge. Obviously, for the time of year, the theme is Halloween. Do you have Halloween photos? Halloween decorations? Or maybe a Halloween theme scrapbook page? I know, they talk about Halloween PHOTOS but you definitely can show off more than just photos!

Post your project on their thread or tag it with #CorelChallenge.

I CHALLENGE you!

Did you see the one i posted on their thread? Just to test how many of you will see it, LIKE it on their thread.


News in the Campus

ToBlur-400Have you registered to the live presentation tomorrow?

We will look at how you can use the Blur command for some functional and creative effects.

It is FREE, as usual!

Register now


New script – Knot #12

Knot 12 - Paintshop Pro scriptHow you would use knots if you had a traditional ribbon can vary from day to day. You would have options to tie that ribbon in multiple manners, attach different objects, wrap that ribbon around all kinds of things. This is why, in digital scrapbooking, there are so many different knots available.

This script for Paintshop Pro will allow you to "tie" a ribbon into a simple knot, but unlike other scripts where you can only choose the color or pattern and everything looks like it is "flood filled" with that pattern, this script will use your own straight ribbon. This is perfect to have a match if you are using the other ribbon in the project, whether it is left straight, or tied into a different knot or bow created with another script.

Grab this script in the store: Knot #12.

For a chance to win this script, tell me how you would customize a knot for your project otherwise. Do you colorize greyscale ribbons? Do you manually create a knot with your ribbon? Do you use a script that asks you for the color to use? Leave a comment below and i'll announce the winner in the newsletter, next week. Not a subscriber yet? Not a problem. You can register here and it is free (and you only get one email per week).

Knot 12 - free samples in PSD formatThis week, i created three straight ribbons (from greyscale ones) and ran the script to end up with three simple knots. Each one is left in unmerged layers so you can put them around any object or insert something in the middle of the knot.

I had fun with colorizing those ribbons with a gradient instead of a solid color. I think that gives a different kind of look to the knot that makes it more interesting (at least, that is what i think).

I also included the straight ribbons so you can use them with other scripts, or as is on your project to match. Or you can insert the straight ribbon directly in the knot too. Why not?

Remember to show off what you used this knot for. What project did you create using it?

You need to be logged in to download this sample. You can either login, or register on the top of this page.


Corel Paintshop Pro Challenge

TextCheck out this week's #CorelChallenge. It is about using text on your project. Well, if you are a scrapbooker, you surely have text on your projects! It could be a fun journaling display, or an unusual title. Or how about a nice Subway art design? We can do so much with Paintshop Pro. Show off what you can do (or just what you have done already).

Post your project on their thread or tag it with #CorelChallenge

Did you see the one i posted on their thread?


News in the Campus

Text-in-silhouetteAs part of the Corel Challenge, i created a text inside a silhouette. I thought it was a great way to use the new text wrapping tool from PSP X8.

I also made a short tutorial on how to create this result. Read it HERE.

New script – Ribbon Tag Banners

Ribbon Tag Banners script for Paintshop ProSometimes, you might have some interesting straight ribbons, but you would like to use them differently. How about creating some banners with bits and pieces of those ribbons? Does it sound like too much work? Of course, it can be tedious to do by hand, but with this script, you will have it done perfectly, in no time.

You have many options and even if you used the same options with the exact same ribbons, you will always get a slightly different result. Add a rope or a stitching on the top and you get another result.

Use your Paintshop Pro and this script to create a matching decorative element for your project, especially if you are using the straight ribbons elsewhere on the page. Or, if you want to add a decorative banner in your kit.

Have fun with this script. Get it in the store: Ribbon Tag Banners.

For a chance to get this script for free, tell me how you would like to "tie" those ribbon pieces: a string or a stitching or something else? I'll announce the winner in next week's newsletter. Not a subscriber yet? Not a problem. You can register here and it is free (and you only get one email per week).

Ribbon Tag Banner for Halloween for freeFor a sample of what this script can do, I used a single ribbon and colorized it in orange, and darkened the other copy to create a Halloween theme banner. The whole element is 3600 pixels wide, but you can easily resize it down to match the the space you need on your project.

Use this banner across the page, or between two photos, or just under the journaling to add focus on it.

The string on top, was made using the VectorTube script and I applied one Rope tube.

You need to be logged in to download this sample. You can either login, or register on the top of this page.

New script – Ribbon Banner

Ribbon Banner script for digital scrapbooking with Paintshop ProYou might have seen those vector banners on various sites, but you wish you could have something using real ribbons, right? Now, you can do that with this script and Paintshop Pro.

Pick any straight ribbon (it could work with a ricrac but it is not as pretty) or a long piece of paper and run the script. Answer the prompts, select the area you want in the center and voilà!

You can use any kind of straight ribbon: lace, translucent, directional, etc. The script is coded to use the whole length of the ribbon so nothing is lost, especially those frayed edges if you have them.

This is even better than using layered templates because it really curves the center piece so you can use patterned designs, text, or stripes and it will follow that curve. In addition, you can have the central part as wide or narrow as you want, and even use a section of the ribbon that is not in the very center.

Grab this fun script in the store: Ribbon Banner.

Banners are often used to announce something and in a layout, it could be a way to label or date it. What would you use it for? Would you add text? If so, what text? Tell me in the comments below and i'll pick someone who will win this script next week. I'll announce it in the newsletter. Not a subscriber yet? Not a problem. You can register here and it is free (and you only get one email per week).

Ribbon banner sampler with the seasonsSince it is harder to add text on a curved ribbon, i figured i might as well create a banner with the text already in for you to use. I could have done a banner for each month of the year, or each day of the week, but i thought it would be interesting to have the four seasons for you to share various photos in a layout.

Each banner is about 3000 pixels wide, so they would nicely fit on top of a layout, almost as a title. Yet, you can size them down, or even trim the ends if you want.

You need to be logged in to download this sample. You can either login, or register on the top of this page.


News in the Campus


WeatherWise-400Have you registered to the live presentation this coming Sunday?

We will play alongside Mother Nature in adding rain and snow to photos.

It is FREE, as usual!

Register now


Corel Paintshop Pro Challenge


Silhouette-300

Do you have a photo with silhouettes? Do you have photos you have edited to create silhouettes? Or do you have other projects (not photos) that use silhouettes, like a card, or a layout?

Submit it to the #CorelChallenge

Let's show the world what we can do with PSP (and not just photography)!

Check out the collage i made for the Create Magic with PSP class. I posted it on that #CorelChallenge thread. Now it is your turn.

And if you want to create your own silhouette, there is a brief tutorial in the Campus HERE.

New script – Painted wood

Painted wood script for Paintshop ProWhether you are creating a scrapbook page or any other graphic project, painted wood elements could add a special touch. And when you can choose one of SIX types of wood, when you can choose any shape, any design and any color, you are sure that your elements will be unique.

There are so many ways to coordinate them with your project, the theme and the the colors.

The script will use a black and white version of your design, leaving the white as bare wood and the black as painted. You will also get a textured paint that will match the grain of the wood, even though the script will randomize the angle and the scale.

You can get this script in the store: Painted Wood.

For a chance to win this script, add a comment below telling me what design you would first use to run this script on. Would you rather do alphabets, arrows, frames, basic shapes, etc.  A winner will be announced next week. Not a subscriber yet? Not a problem. You can register here and it is free (and you only get one email per week).

Painted Wood DigitsAs a free sample, this week, i created a fun set of digits. I used a black fill and a white outline to set the inside to be painted by the script. And instead of a solid color, i used a gradient with the 3 primary colors.

I have to say that i am particularly pleased with the end result. With those primary colors, you can easily embellish a child theme project, or a school theme layout.

You can use those to indicate the child's grade, his age, or the actual year a photo was taken.

You need to be logged in to download this sample. You can either login, or register on the top of this page.


#CorelChallenge

Primary-300

Did you hear about the #CorelChallenge?

This week, you can send in photo, scrapbook page or other graphic projects based on primary colors. Here are some ideas for you:

  • create a monochrome layout
  • use an ordinary photo, turn it in black and white and make one of those primary colors reappear (here is a tutorial).
  • create clusters with elements in primary colors (buttons, ribbons, flowers)
  • use the free digits above to add a colorful date

Go for it. Let's show how we can use primary colors in projects OTHER than just photos. You can do it!

Post your project here.


New script – Text Confetti

Text Confetti script for Paintshop ProIf you want to scatter some confetti in the shape of a "50" or a "Mom", you can use the Picture Tubes function in Paintshop Pro, but you still have to create those custom picture tubes.

This script will let you create exactly that. You can pick the font and the text you want (numbers, or short words work best). You can pick any single or multiple papers to punch the text out from. And you can also add some brightness variation on each individual image.

In the end, you will get a set of picture tubes that will include 81 different "punched" versions of the word or number, so you can scatter them all over your page, if you want to.

Grab this fun script in the store: Text Confetti.

Do you want to win this script? Tell me, in the comments below, what would be your first word or number you would create when you get your hands on this script (and tell me why... i am curious). I'll announce the winner in next week's newsletter. Not a subscriber yet? Not a problem. You can register here and it is free (and you only get one email per week).

For free samples, i decided to offer two. One will be exclusively for Paintshop Pro users, and one will be for everyone.

The first freebie is a set of confetti picture tubes for "1st". In fact, you get TWO sets: one in black and white and grey (which you CAN colorize if you want), and one in primary colors. You just have to drop the .psptube files in the Picture Tubes folder, and you will be able to access them from your Picture tube tool. Then, it will just be up to you to scatter them over your project for a fun accent.

The second freebie is a set of two frames. They are both made from the picture tubes above, but if you can't use a picture tube because you are not a Paintshop Pro user, you can still use those frames. They are 3600x3600 in png format, so almost all graphic programs can use those.

Text Confetti picture tubes - 1st   Text Confetti frames in png format


You need to be logged in to download these samples. You can either login, or register on the top of this page.

#CorelChallenge

Firsts-300

Did you hear about the #CorelChallenge?

Every week, Corel proposes some specific topics or themes and invite viewers to submit projects, photos, or scrapbook pages on Facebook. You just have to tag your post with #CorelChallenge.

Well, last Monday, the theme was "Firsts". So it could be the first tooth, the first kiss, but since it is the start of school, it is a perfect time for the first day of school. Did you take a picture of your child on their first day of school? If so, why not take the freebie from today, and create a fun "First" layout and submit it to the #CorelChallenge? That would be a PERFECT opportunity to showcase something OTHER than photos (since we all know that Paintshop Pro can do much more than just photo editing, right?)

Last week's theme was "Letters and numbers". View my layout HERE. (comments, likes and shares are more than welcome)

Now, it is your turn: use those tubes and create a fun "First" layout for this challenge.

New script – Shattered Mirror

Shattered Mirror scriptIf you like the Shattered script, which breaks up a single image into many pieces, you might actually like this new script. It is somewhat similar to the first one, but in this case, each piece will be converted into a piece of mirror, reflecting the initial image.

You can also let the script move the pieces at random for a really scattered look, or move them yourself (and you can even remove some pieces completely). You can even let the script add a drop shadow to each piece with YOUR favorite settings.

Since every piece is left on a separate layer, you can customize the end result to your liking.

Grab this fun script: Shattered Mirror script.

Do you want to win this script? Add a comment below giving ideas on how you think this script could be used (hint, check the freebie below for another idea). I'll announce a winner in the newsletter, next week. Not a subscriber yet? Not a problem. You can register here and it is free (and you only get one email per week).

Shattered Mirror PapersSince this script should be applied on YOUR own photo, it would be totally useless to offer you a free sample with one of my photos. What would you even do with it, right? However, for the fun of it, i decided to run the script on a simple black and white gradient pattern image to see what it would look like. Well, i thought the end result was... interesting.

I ran the script once and then merged the layers, cropped the resulting image and ran the script a second time.  Since the initial image is untouched i was left with the original (the gradient), the first result, and the second one.

Now, what can you do with this odd-looking paper? Try to blur it to get an overlay. Or play with the blend mode to get something different. But if you were to use your own design or gradient, you can create a kind of "crazy quilt" effect, and add stitching along the lines.

You need to be logged in to download this sample. You can either login, or register on the top of this page.
.


Corel Paintshop Pro blog


64_32-bitWhat do you know about 32 bits and 64 bits as far as PSP is concerned? Do you have plugins that don't seem to work on your new PSP versions? check out this blog post on the Corel Paintshop Pro blog for some information from LeviFiction, a regular contributor on the Corel user-to-user forum.