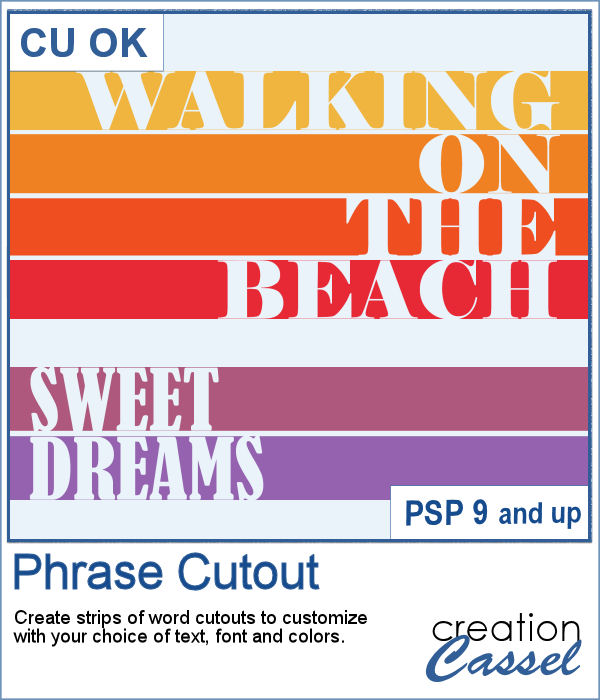
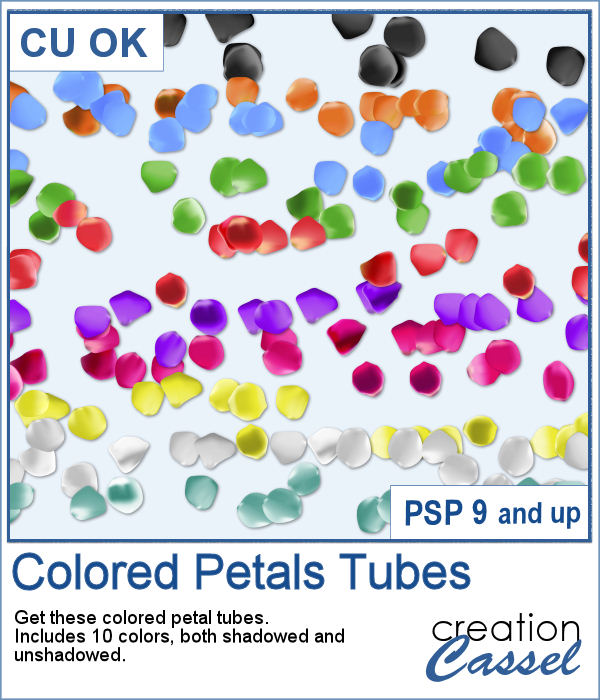
A lot of scrapbookers and designers love to create and use clusters, but the task is often daunting because of numerous repetitive tasks that seem to drain their creativity. So, why not have a script to give them a jumpstart?
This script will almost randomly pick elements from a single folder for you. Starting with long elements like ribbons and stitches. Then adding more rectangular or somewhat smaller elements like frames, cards and such. Finally, smaller or more "square" objects, like flowers, buttons and stickers. Once the elements are picked (one by one), the script will randomly resize them slightly to add variety in your cluster, will rotate them also, and place them based on the type of cluster you want to generate.
You can create a central cluster, or a corner cluster (and you can obviously pick which corner too). And in a single run, the script can generate as many clusters as you want.
Obviously, the script cannot SEE the elements and cannot determine if each element will look good in the cluster. That is YOUR job. But you will have a headstart instead of starting from scratch.
Get this time saving script: Cluster Maker.
For a chance to win this script, I will make this a little different. I want you to just tell me if you have purchased (or won) any of the other cluster-type scripts in the store. If so, which one. If not, just say so! I'll pick a winner next week and it will be announced in the newsletter. Not a subscriber yet? Not a problem. You can register here and it is free (and you only get one email per week).
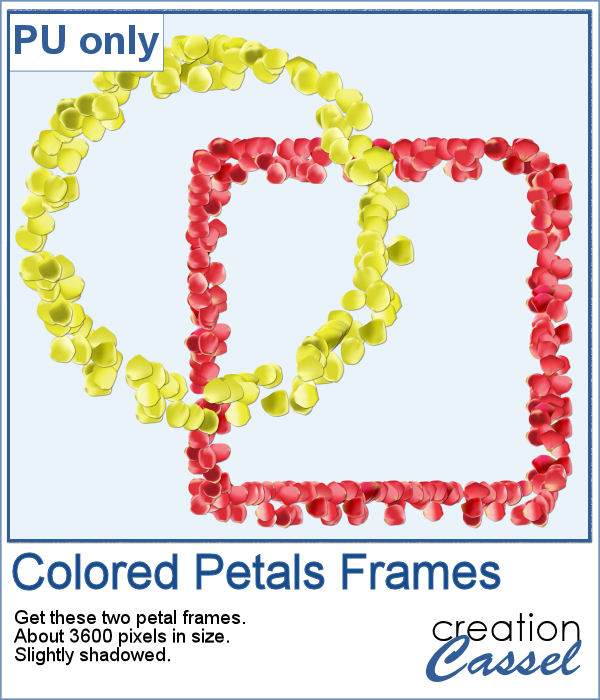
As a samplers, this week, I used a kit from Hat of Bunny, Baby Mine. I ran the script to create a corner cluster for the bottom right corner.
Once the script was done, i tweaked the placement of the elements, and removed a few. Initially, i asked the script to have an average number of elements, knowing i would likely have too many so i could remove them. I also added a couple of elements that were ignored by the script, but that i liked (namely the banners and the string).
All the shadows were added to the elements, individually.
You need to be logged in to download this sample. You can either login, or register on the top of this page.

Although they might be getting less and less popular in real life, photobooth are still often associated with fairs, and fun places. Back in the days, you could get a set of 4 black and white photos in those booth. Over time, they became more modern and started offering color photos. Those strips of photos still bring back memories to many people.
As a free sample, I am offering you the frame that was created when I ran the script for the four pictures of my daughter and her friend. It is 660x1950 pixels, which is about the size of a real photobooth strip of photos. Add your own photos to it and place the result in your next scrapbook project.
Making clusters can be a great way to expand a kit you want to sell, or a way to use a kit you just purchased.
This week, with Heather T's permission, i am giving you the exact strip cluster that I made using this script.
Creating a geometric pattern can be easy if you have only one shape, but it can become tedious if you have multiple similar shapes, using different colors. Until now, you either had to do them by hand, or rely on layered templates, which only offer a limited number of color arrangement.
Although Easter is over for most people, the colors associated with Easter are still very appropriate for spring, so whether you want to showcase your Easter photos, or spring photos, these colors should be quite suitable.
Did you register to our live class, tomorrow? There is still time to do so.
Linda asked me recently if i could create a script that would generate a painted background from an image. Of course, one can always use the Brush Strokes effect in Paintshop Pro, but sometimes, we only want an abstract background based on the colors of a particular image we like. It can obviously be hard to find a perfect match unless we create it ourselves.
This week, i picked a few very colorful images on Morguefiles and turned 3 of them into full size papers. Do you have a fun, happy project you want to showcase? You can use those background papers as a base for showcasing your photos. You can also use those papers in other ways (or use them with other scripts!).
Can you create your own sticker out of any image you have? Sure you can. Use any png image (even if you extracted Uncle Jim from a photo) to turn them into custom stickers. And also, have a peek how you can make that sticker look like it is curling up a bit.
Creating designs for seamless tiles is not that hard, but creating many using the same palette without redoing the same one twice is a little be more challenging.
For a sample, i created 8 tiles in the green colors (for St-Patrick month). Each tile is 250x250 pixels and can be scaled up or down as a pattern. You can add a rotation. You can combine two tiles. You can duplicate a single tile and flip/mirror it to create a different pattern.
What do you know about Adjustment Layers in PSP?
A few years ago, I came up with a script that would create uneven pieces of papers around individual letters. Those were perfect to simulate the look of ransom notes or such and it was called Kidnap Alpha.
This week, I created a basic alpha using this script. The base paper is grey and the letters are either black or dark grey. All the edges are torn.
If you ever had cookies or cakes, you know what a little sprinkles can add to the look!
This week, i had fun "painting" with those sprinkles (it is addictive).
Did you join the live presentation, last week?
You can find various strings in digital scrapbook kits, or sometimes as a set of elements, but are you struggling to find the right color, or the right length, or the right shape?
I created these fun flowers out of the twisted strings. They are fairly large so you can size them down to fit your project. You get two flowers, two leaves and one stem. Combine them as you wish, add them to clusters, make a border out of several flowers, etc.
You might be able to find some ready-made wooden windows in PNG format but what if you could create your own, to perfectly match your project? Use the same wood, or adjust the size or format of the window.
This week, i went a bit out of my comfort zone and created a cluster with a sample window. I had fun using a curly ribbon and wrapping it around the sides of the window, and then, just added some flowers and greenery.