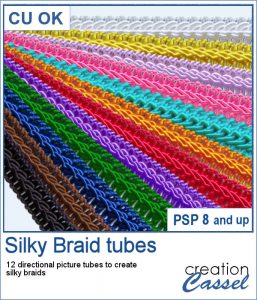
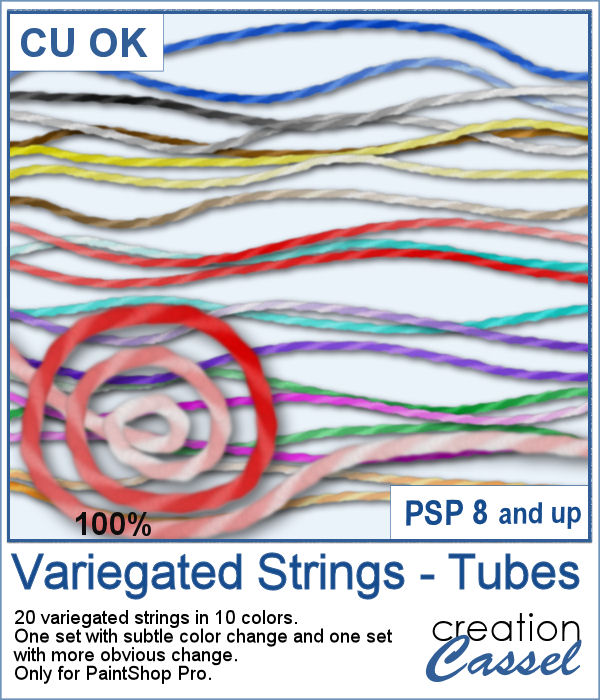
It might be fairly easy to find single color tubes to create a string. In fact, there is one that comes (or came) by default with PaintShop Pro. Strings with two colors can also be found (in the store) but they are much less common. But for variegated strings or ropes, this one is a first as far as I know.
As you draw with these tubes, the colors will change as if you were using traditional variegated wool to knit a project.
Get this set of 20 tubes in the store: Variegated Strings
In order to win these tubes, add a comment on this Facebook post telling us if you already have a string tube (remember, add a comment, not just a Like!) The winner will be announced in the newsletter, next week. Not a subscriber yet? Not a problem. You can register here and it is free (and you only get one email per week).
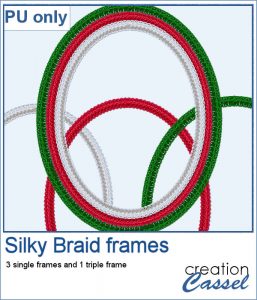
For a sampler, I created a rainbow element that you can use with your projects and a frame using several colors of those variegated tubes. Each element is in PNG format.
You need to be logged in to download this sample. You can either login, or register on the top of this page.

I have seen various masks made from apparent chaos of random frames while allowing the display of a single photo through all those frames. I knew how to create those manually, but figured it would be simpler for PSP users to have a tool to do all the work for them.
As a sample, I am giving you the same template created in the preview. It has unmerged layers so you can add shadows on the frames if you want, you can merge them all before adding shadows or add them individually. You can also change the frame colors, add a bevel, or tweak them as you wish.
Now, you can create as many heart-shaped candies as you want, in any color you want. And they will also have random saying on them. With additional random features integrated into the code, each candy will likely be slightly different from each other.
As a sample, I simply am offering those candies created for the preview. You get twelve fun candies, about 300 pixels wide to use for this coming Valentine's Day project.
Some cameras will automatically add a date on your photo and often, you might want to remove those dates to concentrate on the photo itself. However, in other situations, adding a date might be needed. If your camera took the photo while saving the EXIF information, this script will retrieve that date and add it on your photo. You get to choose whether you want the date on the left or the right of the photo and in which color.
As a sampler, I decided to play with a recent script, the Wooden Puzzle 2, to make you a Valentine theme puzzle. This is a .pspimage (so the file is fairly big) and each element is part of a group, so you can copy and paste it onto any other project, and since all the layers are unmerged, you can move the pieces around as you wish.
A Bargello pattern is made of multiple strips of fabric, cut into more strips and gradually offset from one another. All that delicate work is tedious when sewing fabric, and definitely as tedious if using a graphics program as it will involve multiple selections, cutting and moving.
I created two tiles using individual patterns: one is in the red tones, which you could use for Valentine projects and one with pastel colors for a softer type of project.
Who can say they have too many bows and ribbons? Not a scrapbooker! This script will let you tie a straight ribbon into a multi-loop bow, attached with a centerpiece. Each piece is left unmerged so you can tweak them separately if needed.
For a sampler, this week, I used a starting ribbon from Janet Scott at Pixel Scrapper and modified it slightly (to make it straighter) and ran the script for the basic bow. Then, playing with the Hue map to change the colors from the base ribbon, I created 3 additional versions to run the script again. That will give you those 4 bows to use.
This new script will allow you to slash images or shapes, in addition to add colors or patterns in various ways. Use this to create templates, add colors, make a monogram, and much more.
For a sample, I created a template made by running the script on a single plain back rectangle. This yielded this template that has random slashes. Use the Clip to It script to quickly fill those areas with your favorite photos very quickly.
Have you ever wanted to create candy cane shapes that are not just like a cane? With these tubes, you can create candy cane circles, squares, hearts and anything in between. Since these are tubes, you can draw them in any shape, regular or irregular, and you can even just free draw them.
As a sampler, I created a simple alphabet using one of the candy cane design. Each letter is about 500 pixels high in png format. You can resize them as needed.
Directional tubes are perfect to create decorative elements in any length and shapes. These are no exception. They are extracted from silky braids and tweaked to be directional and as seamless as possible. You get 12 different colors of silky braids to use in various ways, to create straight trims and frames.
For a sample, this week, I created a triple frame but also included the individual frames so you can use them separately. I simply started with a vector ellipse and ran the VectorTube script. I changed the size of the ellipse every time to have different size of frames without resizing the frames (or the trims) themselves.
Instead of starting with a fixed photo shape and ending up with an odd sized frame, how about starting with the final frame size and working your way back to the size of the individual images.
Since everyone loves to display their own photos, I am offering you the layered template in .pspimage version of the frame showcased in the preview. Each photo spot is part of a mask group so that you just have to copy and paste your photo inside that group for it to show through. No need to select, or delete anything.