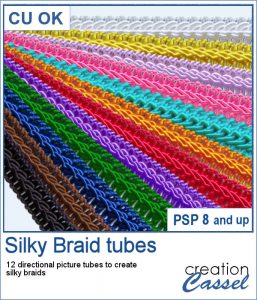
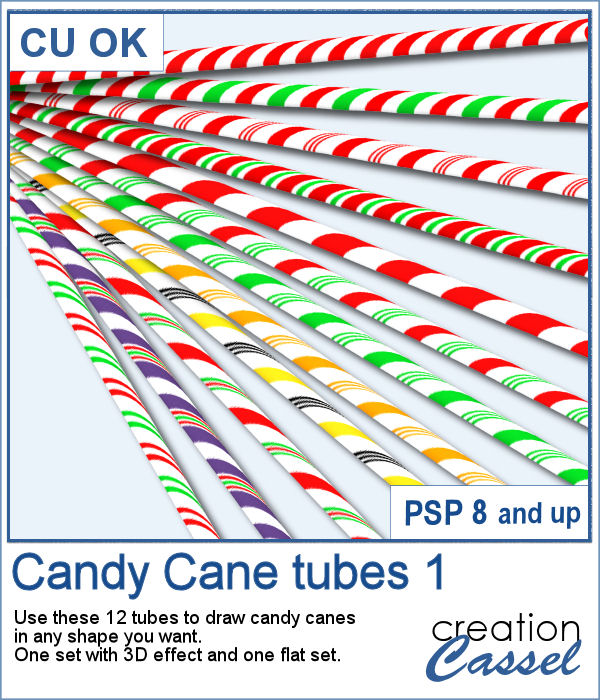
Bows, bows, and more bows. This definitely not the first bow script, and it likely won't be the last either. Various projects seem to require a different type of bow. Sometimes you want it super simple, sometimes you want it flat, sometimes you want it loopy, and sometimes, you want it with multiple loops. This is what the newest script offers you.
Starting with a straight ribbon, the script will create a bow with 8 loops (yeah, that took a while to code!) and will even add a little brad in the center based on the colors of your starting ribbon. Keep it or replace it with something more appropriate for your project or the theme. Use this bow as is or as the base for a cluster.
Get this script in the store: Bow #13
In order to win this script, add a comment on this Facebook post telling us if you prefer simple bows with only two loops, or bows with multiple loops (remember, add a comment, not just a Like!) The winner will be announced in the newsletter, next week. Not a subscriber yet? Not a problem. You can register here and it is free (and you only get one email per week).
For a sample, I created a simple lace ribbon and ran it through the script. I then converted both the ribbon and the bow into a greyscale which gives you a fairly white result. Since they are monochrome, you can always colorize them to match your project, or keep it as is and just add a colored center.
The bow is in .pspimage format, with the bow and the center on separate layers. The ribbon is also included so you can use it on other projects.
You need to be logged in to download this sample. You can either login, or register on the top of this page.

Whenever you are creating a kit or a layout, you might want to include or use some matching ribbons. Unfortunately, not all kits have them. If you are creating your own kits, then you will want to add such matching ribbons, but in the end, you tend to use the same type of ribbons, while you would prefer some variety.
As a sample, I am including 12 of the many ribbons that were generated in making the preview for the script. Using 6 papers from a kit from Janet Scott. You can find that paper kit
If you liked to play with pipe cleaners when you were a kid, and loved making them into various shapes by twisting them, bending them, folding them, then you will LOVE these tubes. As tubes, you can just use your cursor and create them as long as you want, in any shape you want. You get a total of 12 different colors of pipe cleaners.
Did you get some pictures of your last Valentine Day with your valentine?
For a sample, I created a heart shape frame using a preset shape, and ran the VectorTube script to place the little hearts all along the shape. With a little shadow added, you have a fun frame. The shadow is only added to the chain, so you can add your own shadow to the whole frame if you want.
Threading your favorite ribbon manually around a frame is very tedious and hard to do precisely, but this script will allow you to do it using any straight ribbon you already have.
For a sampler, I simply am offering one layered template made with the lace ribbon in the preview. Everything is left on unmerged layers so you can use the template and modify it as you want. You can punch a whole in the center, or clip some fancy papers on it, or replace it by your favorite photo, like in the preview.
You can never have too many bows to embellish your projects. And since you can now create them from your own ribbons, you will have a perfectly matching element to attach to the ribbons.
For a sampler, I created 3 basic ribbons with a Valentine Day theme and ran the script. So you will get 3 straight ribbons (that you can run other scripts on) and 3 matching bows.
The Crochet Lace edges have been so popular in the past that I am back again with another set. These are extracted photos that needed to be edited to make them really seamless.
As a sample, I wanted to show you how the two directional lace tubes can be used to create circular elements.
You might want some rough twine rope to tie some elements or to create a loose bunch of ropes, but you can't seem to find the right one, of the right color, or the right length or the right shape? These picture tubes allow you to draw your twine as long as you want, in any shape you want and with 10 different colors (and you can also colorize them).
As a sampler, I embellished a wood frame with the yellow twine tube, to match an old bouquet of flowers. The frame is in png format and about 2000 pixels wide. You just have to slide a photo on a layer under the frame and erase whatever exceeds on the outside. The frame already has the shadows included so you don't have to add anything!
You might have those lights, at home, to decorate your windows or your tree, but now, you can do the same with your digital projects (and no electric cost).
As a sample, I create another swag for the Holidays, made exclusively of tubes from PSP or from the store. You might recognize the light strings from last year (none of the light is burnt!).
In traditional paper scrapbooking, there are tools that allow the user to punch the corners into intricate shapes. They are great if you want to use the same size for all the projects you do. In digital scrapbooking (or card making), you now can use similar "punches" simply by using the eraser tool and those fancy "corner punches" shapes. This is the fourth set of those brushes.
As a sample, this week, I created this fun frame (and matching template so you can use it with other colors/papers/effects).