If you like jewelry, you will love this script to create gold or silver elements.
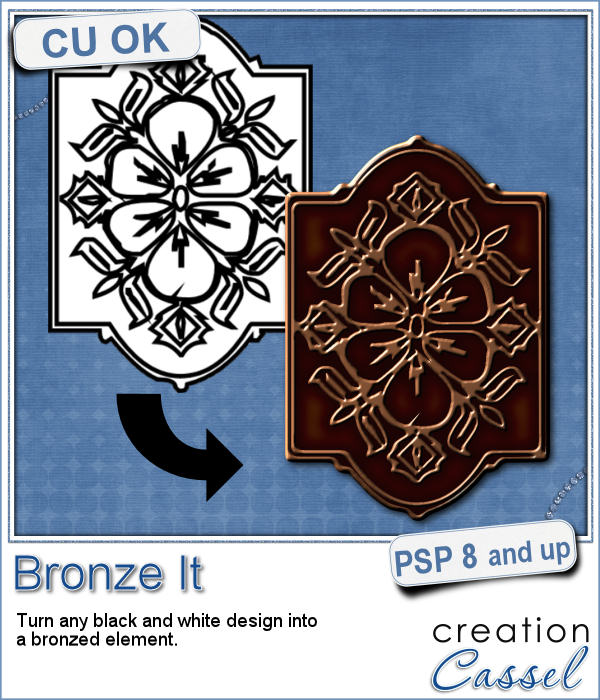
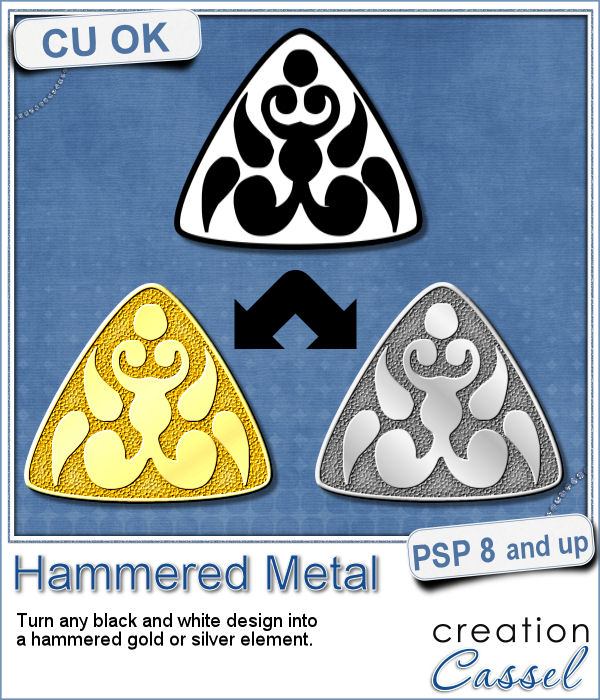
You will get a hammered texture on your piece based on the black and white design you will start with: the white area will be hammered while the black area will stay smooth.
What can you create? You can use any design so your element can be any shape and any size. You can create tags, coins, word plates, frames and more.
Get this script in the store: Hammered Metal
In order to win this script, add a comment on this Facebook post (remember, add a comment, not just a Like!) The winner will be announced in the newsletter, next week. Not a subscriber yet? Not a problem. You can register here and it is free (and you only get one email per week).
As a free sample, I created some "tags" illustrating some common life events (first day of school, first car, graduation, new baby, new house, trip/retirement) that you can use for your various projects.
Each element is 500 pixels so you can size them down to fit your need.
You need to be logged in to download this sample. You can either login, or register on the top of this page.

Slats are a fun way to display images as if we had multiple frames, but if you want to add a word or phrase, it makes for an even more custom display.
As a free sample, i converted the slats used in the preview into a template. You can use it for your own photo. Make it sideways if you prefer. Cut the slats if you have a wider image that is not as high. Be creative!
It is fun to have variety in the letters we can use for titles, but it might be hard to find something that really suits our projects, its feel and its color palette.
This week, i ran the script 4 times, using a different font and a different color each time. That just gives you a complete alpha with some variety. You will then be able to get some mix of different letters as if they came from different sources.
This week, I figured I would create a script to allow you some fun effects on photos. Those effects would be yours to choose.
As a free sampler, this week, I could not use this script since it applies to a particular image of yours, so, since the Bronze It script was SO popular, I created a set of tags for the 12 months of the year. You can use them to date your layouts, your adventures, or anyone's birthday.
If you want to get the edges of a photo to be torn, it is fairly easy to do manually since the edges are straight. You can also find some standard size templates for those photos (like in the freebies below). However, if you want to have a torn edge around an element of a different shape, it can be a tedious task to do manually.
As a free sampler, i could have created a set of digits or an alphabet, but i thought of making a series of templates that you can use for your photos or your journaling cards. I created 4 templates with fairly standard sizes. Once the script was completed, i extracted the edges to add them as a new layer. That can now allow you to replace the grey layer by your own photo or card or paper.
You have often seen bronzed busts or bronzed baby shoes. Those are "luxurious" elements. You can now add the same rich look to any element for your projects.
This week, I thought of making an alphabet but i thought that the bronze texture inspired me to create elements with the 12 zodiac signs. I used a font to create those designs (you didn't think i drew them myself, did you?)
Do you like the look of a nice "official" seal to put on your project but can't find one in the color you want? Or would you like to find one that has the name of your child, or the name of the city you visited, or the specific date of your last vacation?
Since February is coming, and so is Valentine Day, I decided to create a few seals that you could use either on scrapbook pages about your loved one or on custom card or design you might create for him/her.
If you have used the Word Cutout script, you know that it would only use the edge of the photo. However, sometimes, the edge holds some meaningful parts of the image and you would like to cut the words out of another location.
Using a black image, 4000x3000 pixels, i ran the script 3 times to add the individual words of "Live", "Love" and "Laugh". To make them even, i used guides before running the script, so my selections were always the same height. Neat trick!
Although it might be easy to create a simple puzzle with 20 or 30 pieces, it is a whole different story when you want to have hundreds of pieces.
Since this script is to be applied to your own photo, i thought i could create a little something using last week's script, the Painted Cardboard.
What do you like about incorporating ripped pieces of papers in a digital project? The rustic look? Maybe. But how do you go around getting those for your layout other than scanning them?
As a sample, i created 3 frames using this script. All three were made starting with a different gradient instead of a solid color. They are about 6 inches in the longest side so you should be able to get a photo in them.