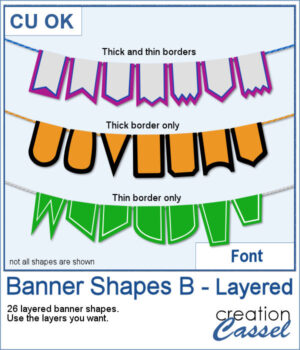
Not only can you use this font to create banners hanging from a string, but you can also have combinations of colors with the thick and thin trim options. Use one, or both trims to match the colors to your photo, your project, or your school colors!
Create banners as long as you want. Add text afterward or leave them blank for just a touch of color.
Get this font: Banner Shapes B
In order to win this script, add a comment on this Facebook post telling us if you have used layered fonts before (remember, add a comment, not just a Like!) The winner will be announced in the newsletter, next week. Not a subscriber yet? Not a problem. You can register here and it is free (and you only get one email per week).
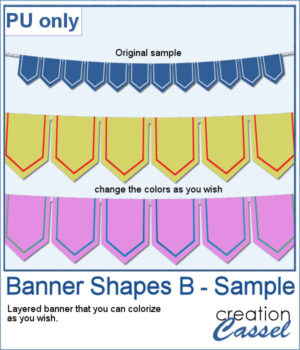
For a sampler, I created a simple string of 12 banners that are left in layers (string, banners, trims) that you can colorize however you want to suit your project. The file is in .pspimage format and compatible with all PaintShop Pro versions.
You need to be logged in to download this sample. You can either login, or register on the top of this page.

You can now create your own alpha from keyboard keys. You can have thick keys or thin ones, depending on your preferences.
For a sampler, I created a simple thick green set of keys with white characters on the bottom left (a little unconventional). The alpha includes all the letters, the digits and a hyphen to let you type in dates and more.
For any summer theme, you can create watermelon slices in any shape you want. How often have you seen a watermelon slice in a heart shape, or an arrow shape?
For a samplers, I created a complete alphabet (A to Z) and also a set of digits (0 to 9) to allow you to create just about any title for your summertime projects.
Engraving metal can be a way to customize a variety of elements and this script will help you achieve that.
For a sample, I created a set of gold alphas pieces that can be used for titles or as initials. Each piece is just under 500 pixels in size so you can resize them as needed.
Tickets are very versatile elements you can add to your projects to incorporate some meaningful information or just fun words.
I created four series of tickets, for the four seasons. Since I wanted to leave the top area empty for you to add your own text, I hid that layer before saving the strips. Now, you can add a date if your want, or anything that would fit in that area.
You might be familiar with the Dimension script where one could add an even thickness, in whatever color you wanted. This time around, the thickness would follow a gradient, whether it is already made, or based on two or three colors you will choose.
As a sample, I created a full alphabet using a rainbow gradient for the edge. This will be perfect for your spring themed titles and projects.
With spring weather, hopefully coming soon, why not create some flowery foliage in any shape you want? It could be letters, digits, symbols, preset shapes, or hand-drawn vector shapes.
Do you want to add a spring title to your next project? You can use this complete alphabet to do it. You get all 26 letters made of foliage with light pink flowers. Aren't they pretty?
Many years ago, some gold and silver chain picture tubes were added to the store and they were a hit as they were among the most popular new directional tubes. Over the years, different types of chains were added and this time, we wanted to add some bling to anyone's project.
For a sampler, I created two frames using different diamond links. You can use those frames to showcase your favorite photo or a quote, or even some journaling on your project.
It is always interesting to use an actual photo and use it to create background papers since they will perfectly match.
As a sampler, I used this St-Patrick photo to generate 6 seamless tiles. All the tiles are 400 pixels wide but of different lengths. They all show some greens but also the white and orange from the Irish flag. This is perfect for you St-Patrick projects. If you find the colors too bright, you can blur them or desaturate them to suit your projects.
You can simulate the old method of fastening photos in albums but without actually cutting the background.
As a sampler, I used the dimensions of a standard 7x5 photo, and ran the script on a black rectangle. The script treated the rectangle as a photo, and now, you can replace the rectangle by your own photo. Convert it to a mask if you want, but you can also just trim it. More interesting for you, you can move the linked layers to place the photo somewhere else on the page. Build the rest of the page as you wish with papers under it and elements on top.