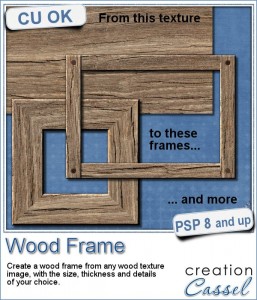
 I know, you can probably create a wood frame very easily, right? Using Paintshop Pro, some tasks are quite easy and creating a wood frame is one of those. However, it still takes a bit of time, and if you want to create a series of frames, for a kit or a collage, it can quickly add up.
This script will create the frame in less than 30 seconds. Yes! You will start with a texture image of wood (you can choose fine wood or old wood), and the script will literally cut pieces to create your frame. No two pieces will be identical (in real life, they never are, right?). The script will also calculate the size of frame you can do based on the starting image dimensions. Also, once you have chosen the inside size of the frame, it will calculate how thick you CAN create the rest of the frame.
As an added detail, there is the option to add rusted nails to the corners, if you chose the overlapped type of corners. Those are picture tubes that you can also use in other projects if you want.
Grab this script in the store: Wood Frame
Would you like to get this script for free? Tell me if you tend to prefer the overlapped type of corner or the mitered type. Tell me in the comments below and i'll pick a winner next week to be announced in the newsletter. Not a subscriber yet? Not a problem. You can register here and it is free (and you only get one email per week).
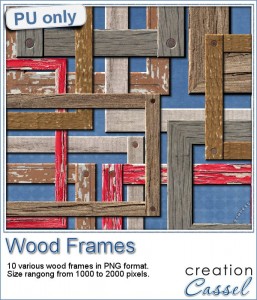
 How about a few frames to play with? I created 10 frames for you: 5 have mitered corners and 5 have overlapped corners. Their sizes range from 1000 to 2000 pixels, but you can easily resize them if you need.
They are all in png format so they can be used in just about any program you have.
Most of those frames are pretty rustic as i used worn, old or painted wood images to start. I also adjusted the color of the nails when they were used so they would match the rest of the frame a little better (that is something you can do with the script since everything is left unmerged for you to tweak the individual pieces).
You need to be logged in to download this sample. You can either login, or register on the top of this page.
Corel Challenge
 Do you have photos of your clock or watch? Maybe a photo from New Year's Eve? How about an in-review project where the time is illustrated with a clock or a watch or other time ticking device? Post it on the Corel page HERE.
Remember that they don't need to be only PHOTOS, but you can post scrapbook projects too!
I would love to see one of your projects posted on the Corel page.

I prefer the overlapped type of corner over the mitered type to me they look older
For a rustic look, I prefer the overlapped corners.
I prefer the mitered corner but sometimes you just have to have that overlapped look. 🙂
I prefer the overlapped look, with nails on the corners to make them look old.
It depends on the finish I am after. For a more rustic appearance, I would prefer the overlapped effect, with the nails, but for a more formal effect, I would optfor the mitred look, as long as all 4 sides are different and not repeated.
Thanks Cassel. I agree with vickir46, the overlap corners are great for rustic, old time type photos, particularly with distressed wood textures, but for a bit of ‘class’ the mitred corners with nice teak, mahogany, cedar etc would look better.
Love these frames. Always looking for frames.
I like both the overlap and the mitred…it all depends on the scrapkit or layout that I am building…these are awesome.
Mostly mitered for me, but like others, I know the overlay ones would be needed sometimes.
It is wonderful that the script will take the math out of deciding how big we can make the frame!
Thank you for the chance to win.
Wow this looks like so much fun. I use frames a lot and can see this script will be extremely handy to have. most of the time i prefer mitered corners. i think they look neater. however, i will also occasionally use the overlapped technique for things such as a rustic, childish, or handmade look